Reading time: minute(s)
 Deutsch
 English
 Français
Edit an address layer
This chapter describes the options for editing an existing address layer:
 Rename address layer
If your permissions allow it, you can rename an address layer.
-
Open the data manager via the “Data management” entry either from the application menu or from the home area.
-
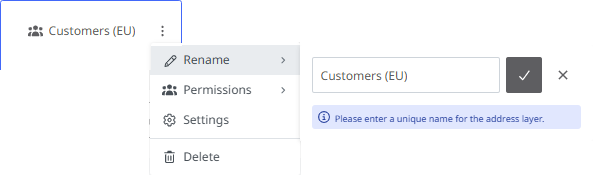
Move the mouse pointer over the tile of the address layer that you want to rename.
-
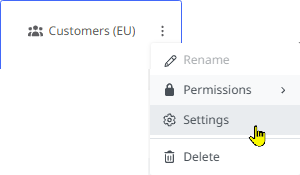
Click on the three dots and then on the <Rename> button. The input field for the name of the address layer is displayed.
-
Give the address layer a unique name and confirm your entry.
The address layer is now displayed with the new name.
Add addresses
You can add further addresses to an existing address layer.
-
Open the data manager via the “Data management” entry either from the application menu or from the home area.
-
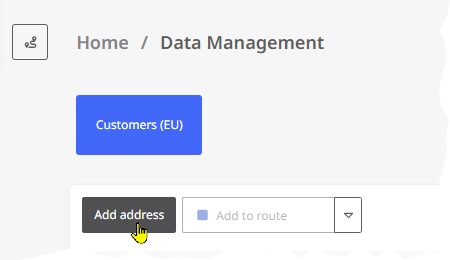
Click on the <+ Add address> button for the desired address layer.
-
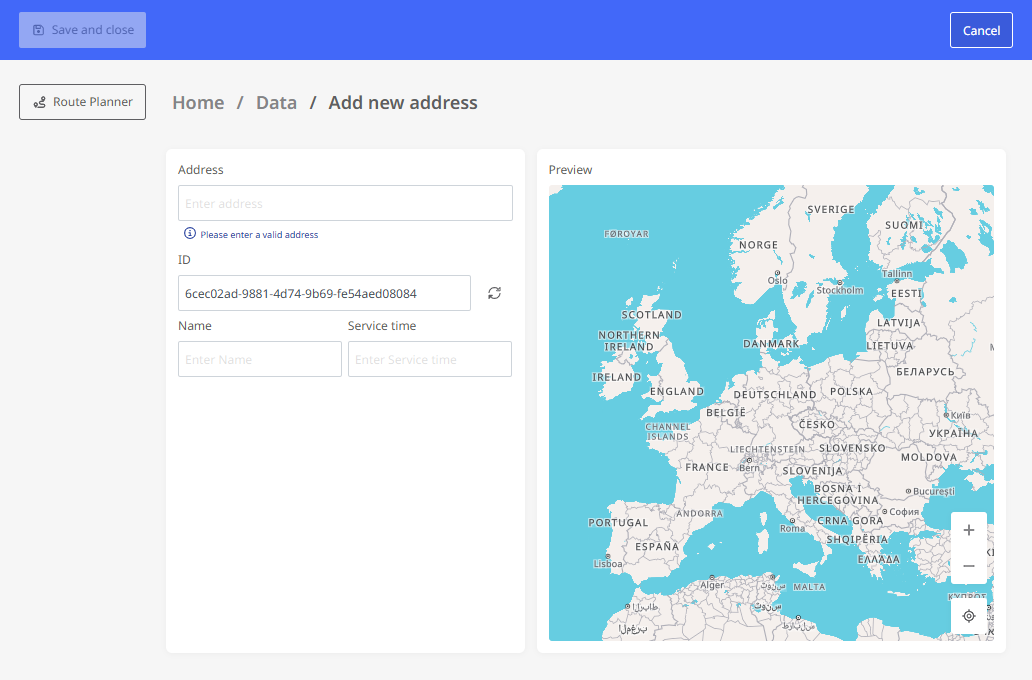
The window for entering the address is displayed.
|

|
-
Once you have entered all the information, confirm the address with the <Save and close> button. The new address is now included in the address layer.

Note: You can only use the <Add Address> function if the address layer has the status “Public” or “Private.”

Edit addresss
-
To edit an address entry later, click on the desired entry in the list.

-
The address entry window is displayed. Here you can
-
change the actual address - use the search field to determine the new position.
-
Change information in user-defined fields.
-
-
Click <Save and Close> to save the change. The address will now be displayed in its changed form in the list.
Note: You can only edit the addresses of a layer if the address layer has the status “Public” or “Private.”

Delete addresses
You can select individual or multiple addresses and delete them from the address layer.
-
Open the data manager via the “Data management” entry either from the application menu or from the home area.
-
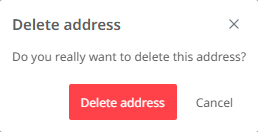
Now select the address(es) to be deleted using the checkboxes in the left-hand column and click <Delete>
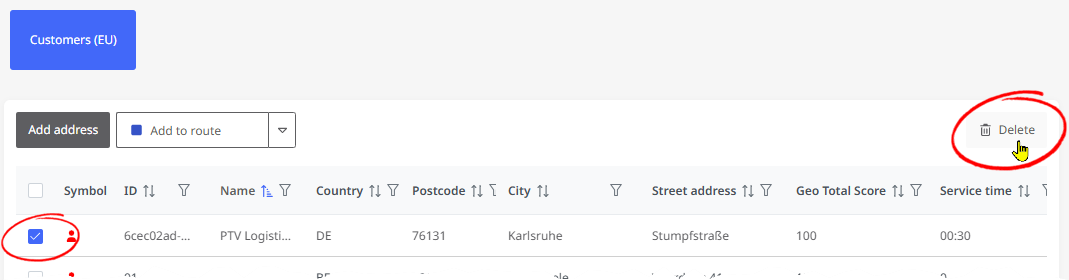
The address is thus deleted from the address layer. This cannot be undone - if necessary, you can add the address again as described above. |
|
Note: You can only delete the addresses of a layer if the address layer has the status “Public” or “Private.”
Edit settings for an address layer
In addition to the permissions for an address layer, you can also configure the display of address data.
Proceed as follows:
|
|
|
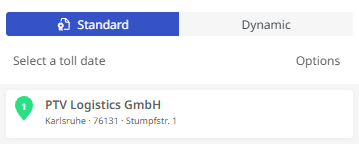
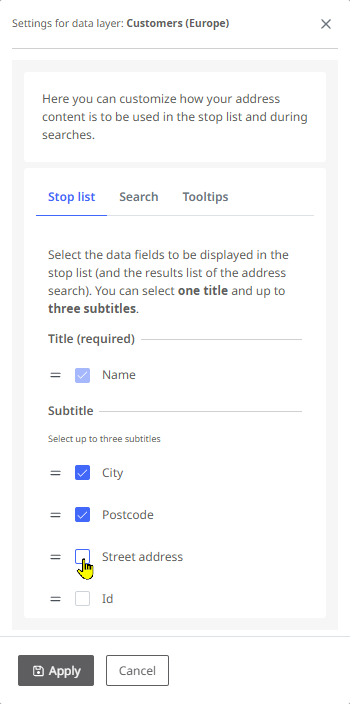
On the "Stop list" tab, you can specify which data fields from the address layer are to be displayed in the stop list and in the results list (for searches).
The configured data fields are now displayed:
Note: The information you configure here for display in the stop list will also appear in that order in the “Address” column of route reports. They will also be displayed in the address field on the “Cost per leg” page of the report.
|
|
|
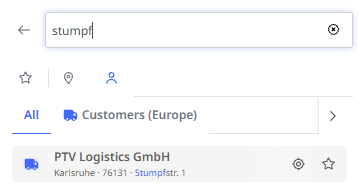
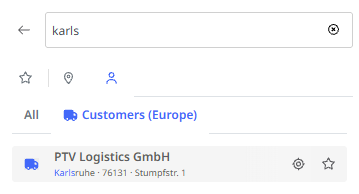
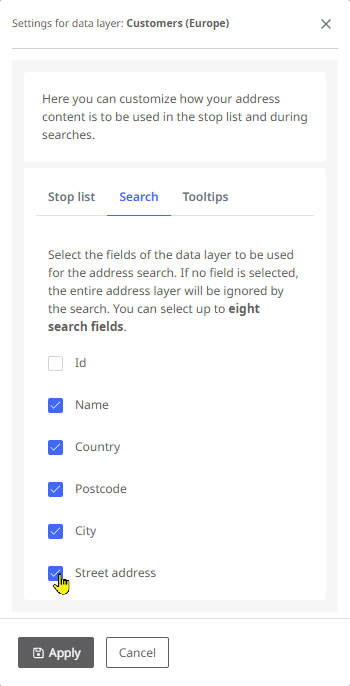
On the "Search" tab, you specify the fields that are to be included in the search via address layers.
If you now enter a search term that is found in one of the configured data fields when searching via the address layer, the hit list displays the corresponding result.
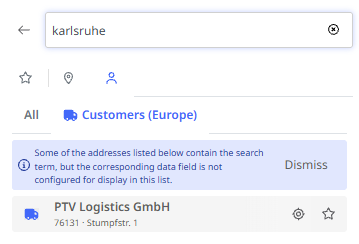
If a corresponding hit is found during the search, but the data field containing the hit is not configured for display, a corresponding message is displayed.
If you no longer wish to see this note, you can click on <Dismiss>. You can reactivate the notice at any time via the " Settings " -> "General" -> <Display all notices again> module. |
|
|
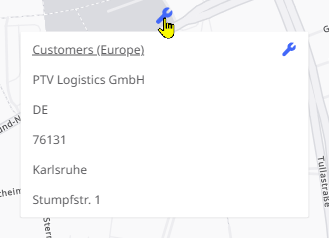
On the “Tooltips” tab, you can specify the fields that are displayed when an address is shown as a tooltip on the map.
If you now move the mouse over an address from the address layer on the map, the configured fields are displayed in the tooltip.
|
|